The Contact Manager Tutorial
STEP ONE: Send a List to the Contact Manager
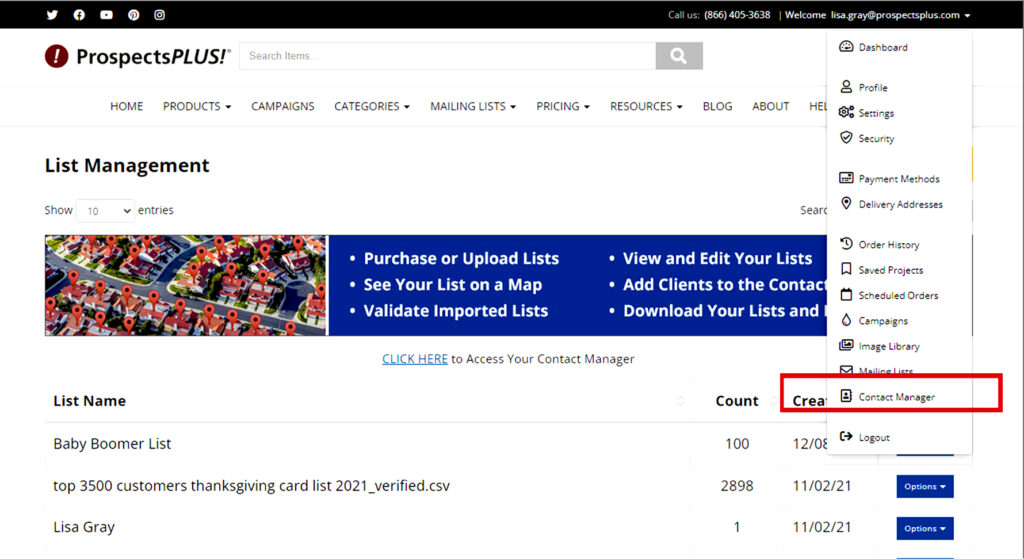
To send contacts from a list to the Contact Manager, click on your email address from the horizontal black navigational bar in the upper right-hand corner. A drop-down menu will appear. Choose “Mailing Lists.” from the menu.
Once in your mailing list section, decide which mailing list of contacts you want to move over. This list will also still remain in the “Mailing List” section as well.
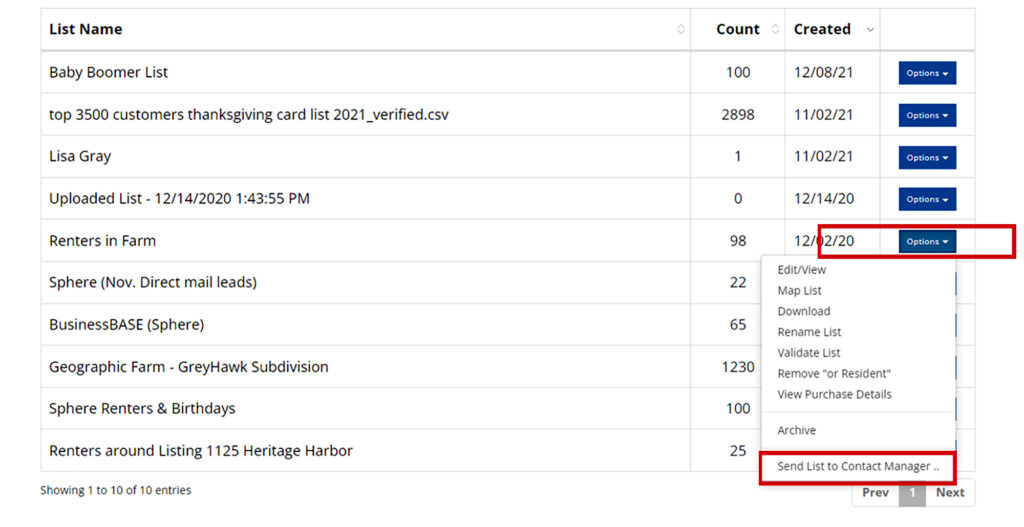
Once you decide on your list, click the blue “Options” button for that list and choose the option “Send List to the Contact Manager” (see screenshot below).

STEP TWO: Add Tags to Your Mailing List
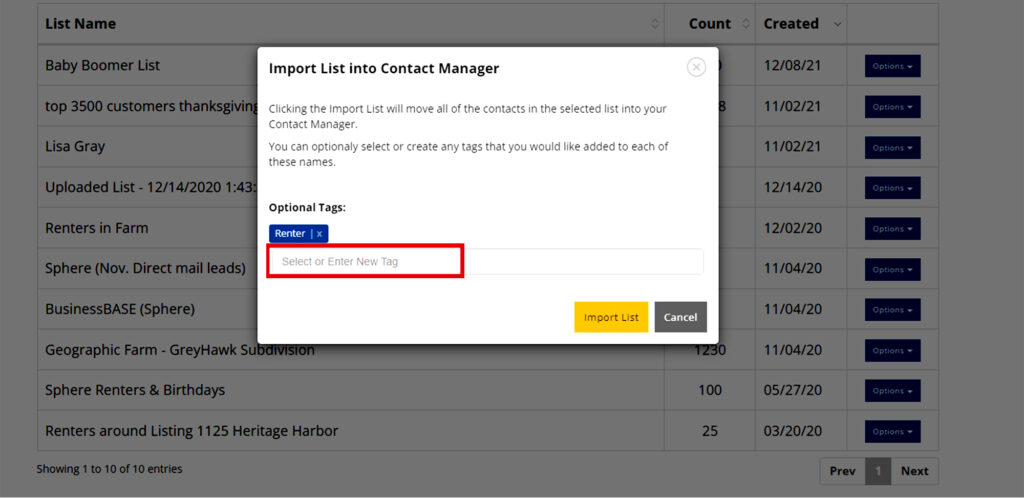
A window will pop up after you complete STEP ONE, allowing you to add tags to the list you are sending to the Contact Manager.
You can type in one tag or multiple. There are some tags already available in the tag drop-down menu. If you don’t see a tag you want there, you can create a tag by typing it into the provided space.
Once you are done adding tags, click the yellow “Import” button, and your contacts from this list will be imported into the Contact Manager.

STEP THREE: View Contacts in Contact Manager
You can now go to your Contact Manager and view contacts from this list. You will not see your list title from the mailing list section in Contact Manager, only the contacts from the list.
To get to Contact Manager, click on your email in the upper right-hand corner of the website and choose “Contact Manager” from the drop-down menu (see screenshot below).
Once in the Contact Manager, you can filter the contacts listed by using the “Tag Filter” located at the top center of this section to see how many tags there are with a specific tag title.
You can also add a new contact name to your Contact Manager by clicking the yellow button that says “Add Names.” Be sure to complete the new contact’s birthday and home anniversary date if there is one.
The “Add Names” yellow button can also be used to download your entire “contact Manager” list with tags and export it from the website.

STEP FOUR: Send a Postcard to a Specific “Tag” of Contacts
To send a postcard to a specific “tag” of contacts, choose your postcard from our postcard section.
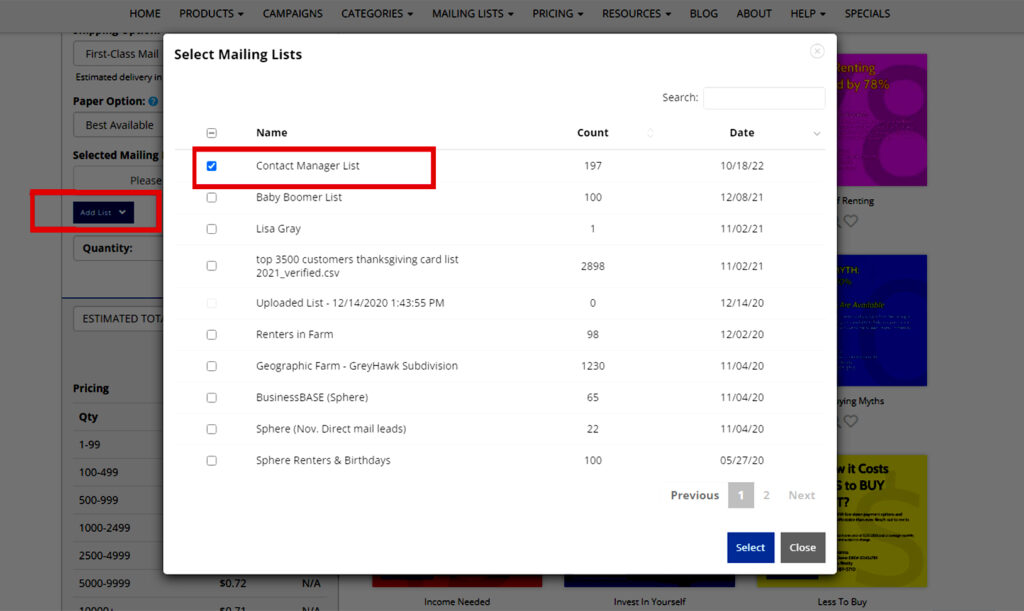
Once you are on the postcard series screen, select the blue button titled “Add List’ (see screenshot below).
A drop-down menu will appear. Select the “Contact Manager List” and hit the “select” blue button (see screenshot below).

STEP FIVE: Add Specific Contact “Tags” to Your Mailing List for Your Postcard Mailing
Now add the “tags” you want to use to create your super-targeted mailing list in the box provided (see screenshot below). As you add the tags you want for this mailing list, they will appear in blue (see screenshot below). The screen will also give you your new quantity of contacts for this “tagged” mailing list.
Once you are done adding your tags, you are ready to continue editing your postcard and send it out to your new targeted list.

Please reach out to our support team at 866.405.3638 with questions or if there is anything we can do to help you in your success.


