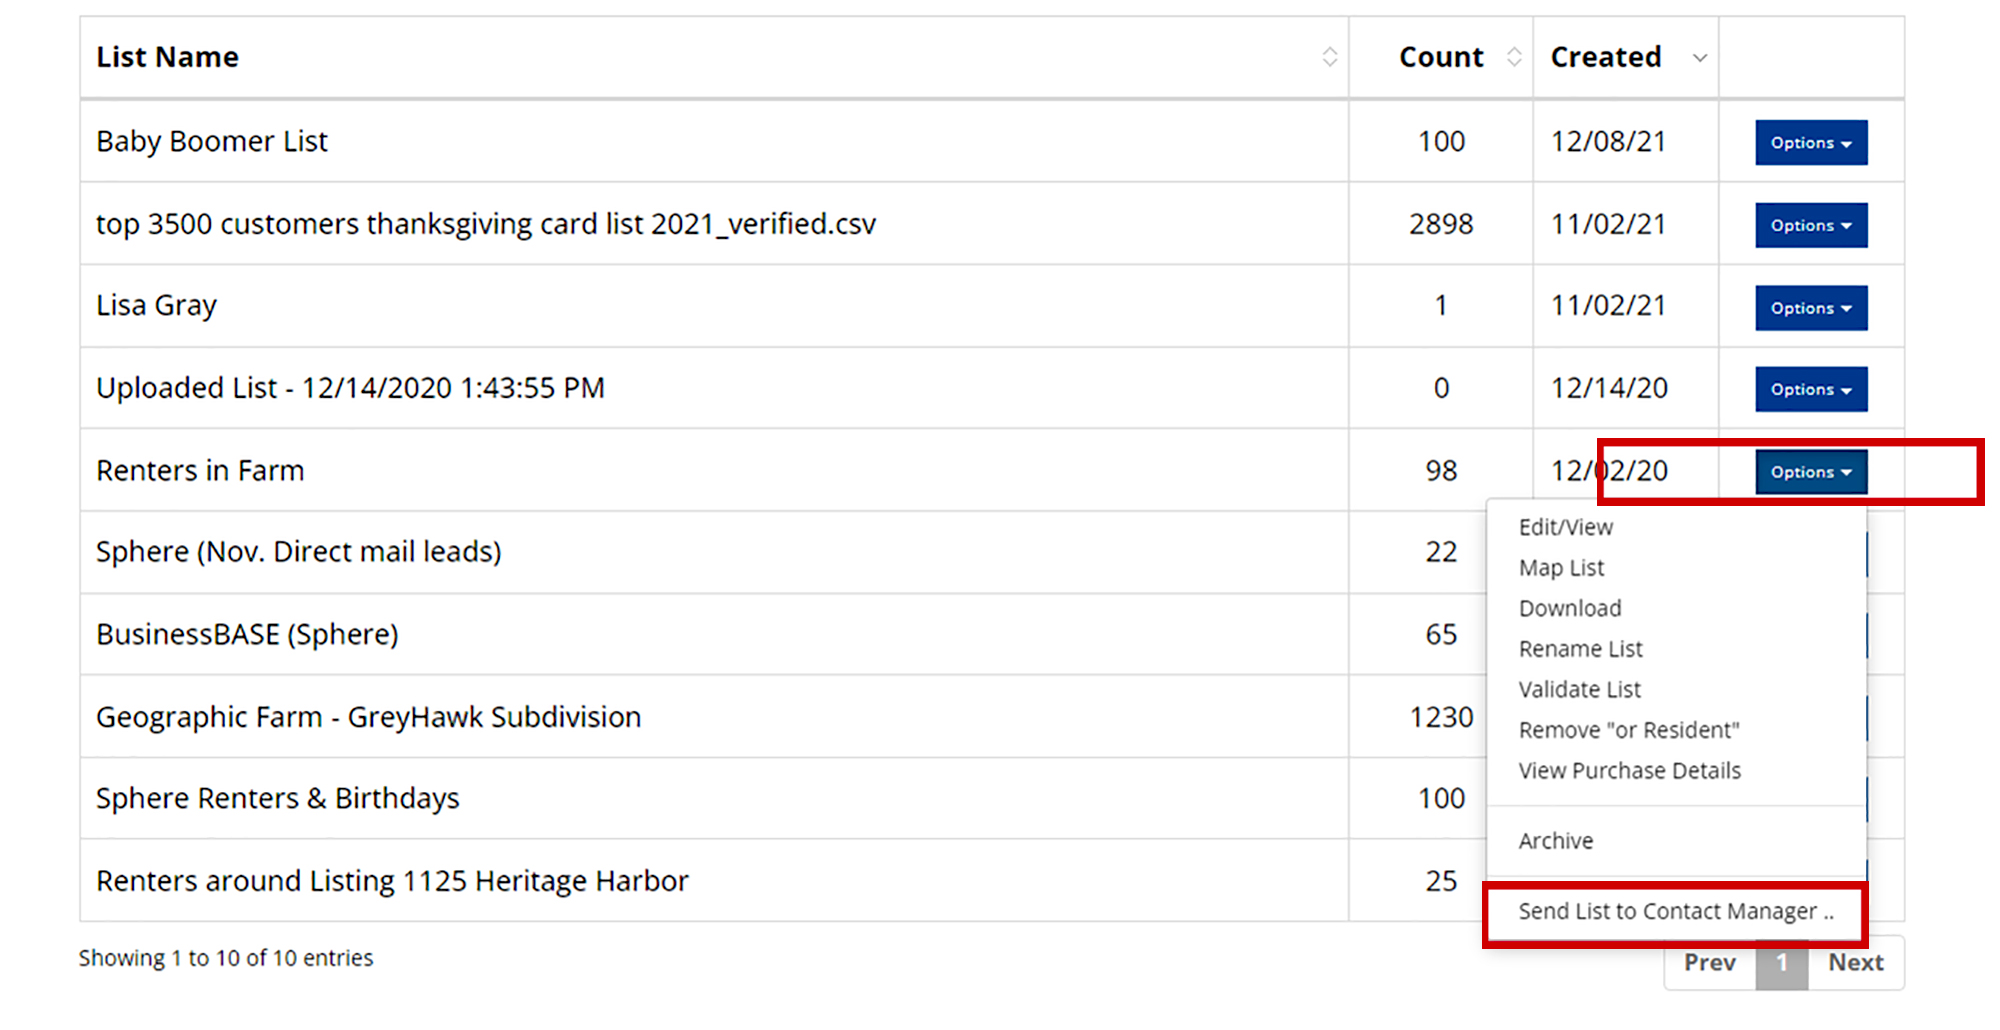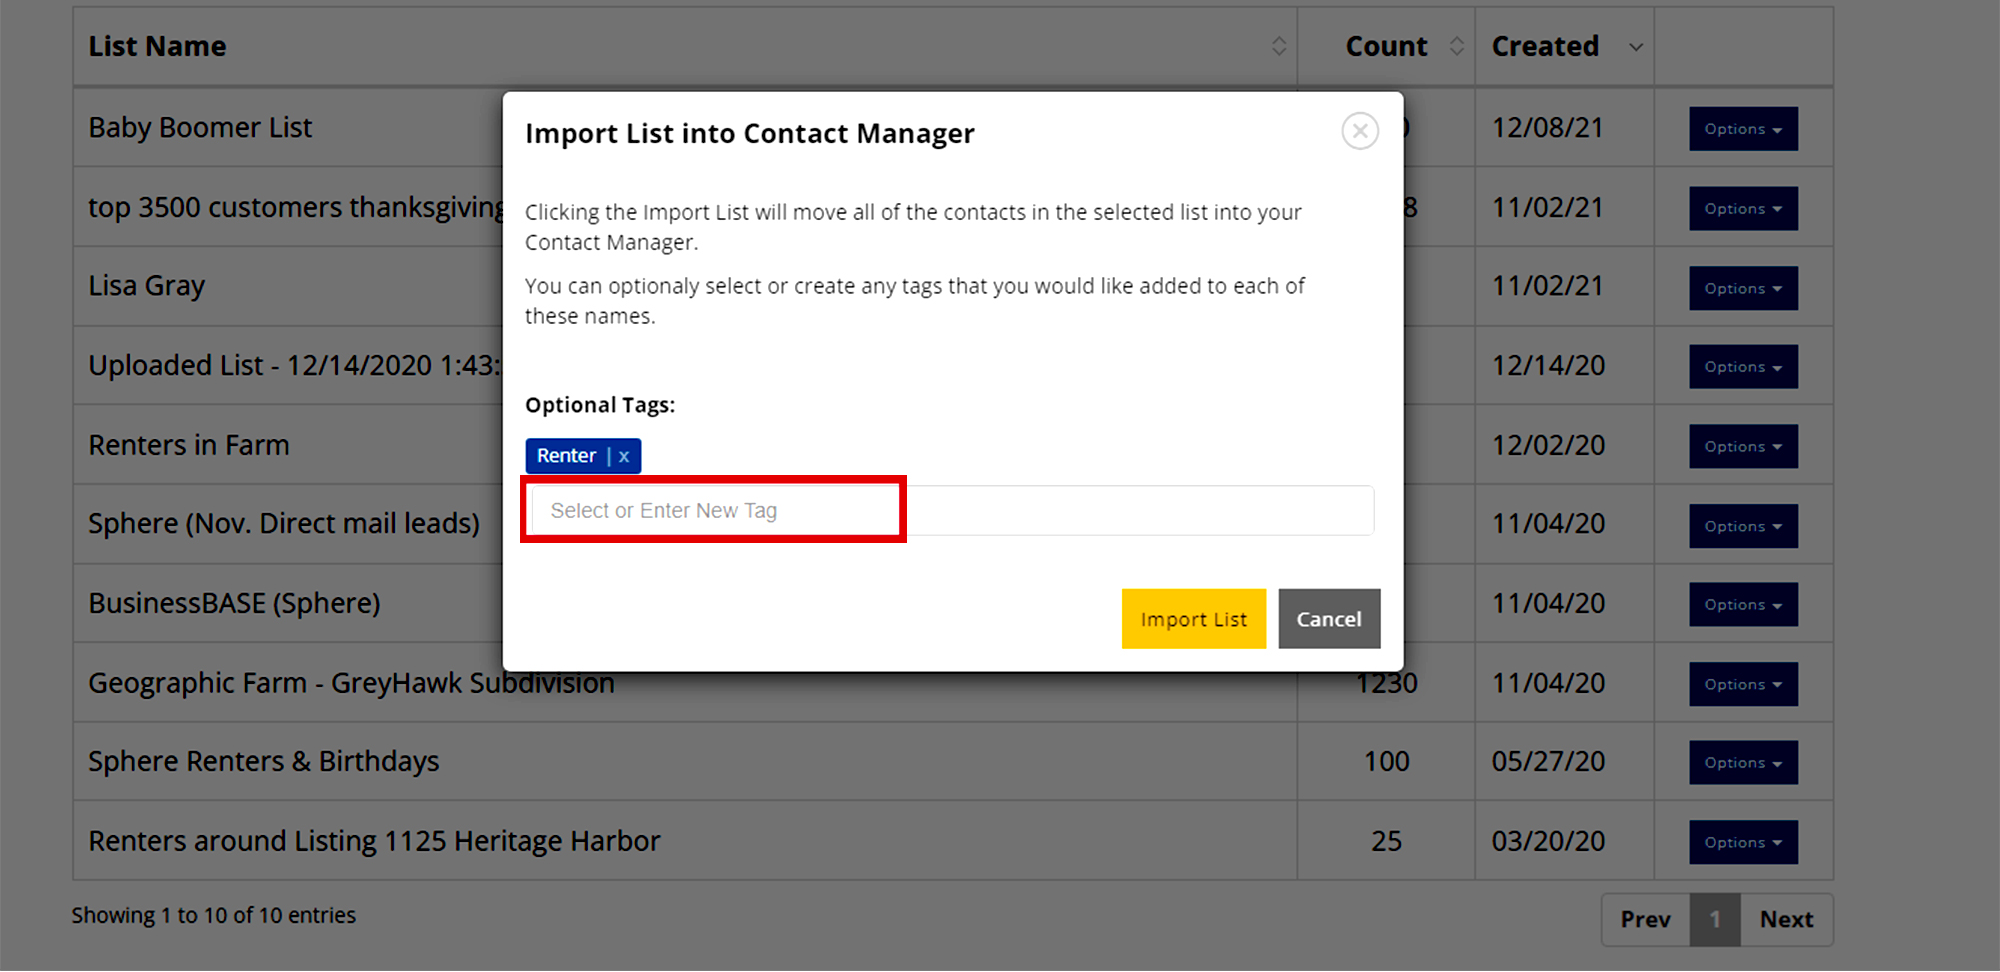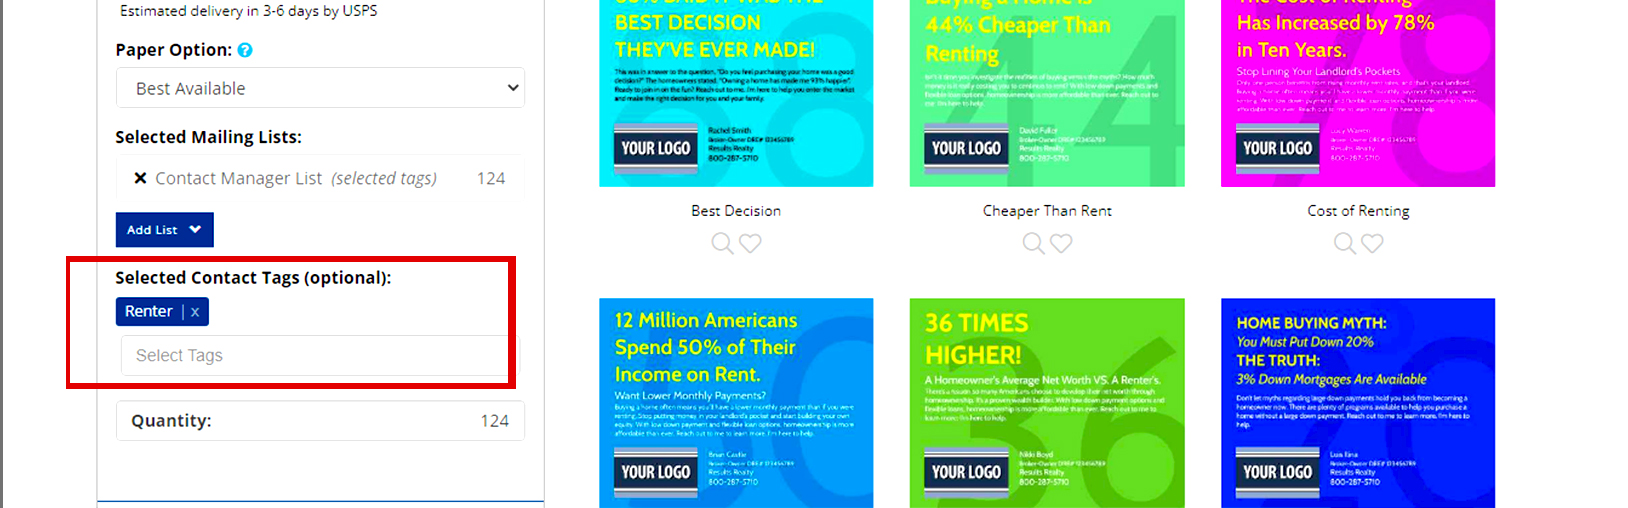

With our FREE Contact Manager, you can tag entire mailing lists or just one contact within a list, building one highly targeted list from many.
Now achieve better results from your marketing and ensure you are hitting the ideal target within your various lists with the right message at the right time!
This new tool is available to use right now on Prospectsplus.com, for free, just for being a ProspectsPLUS! member.
To check out the Contact Manager tutorial, CLICK HERE.
The Following are Five Ways You Can Start Using the New Contact Manager Today!
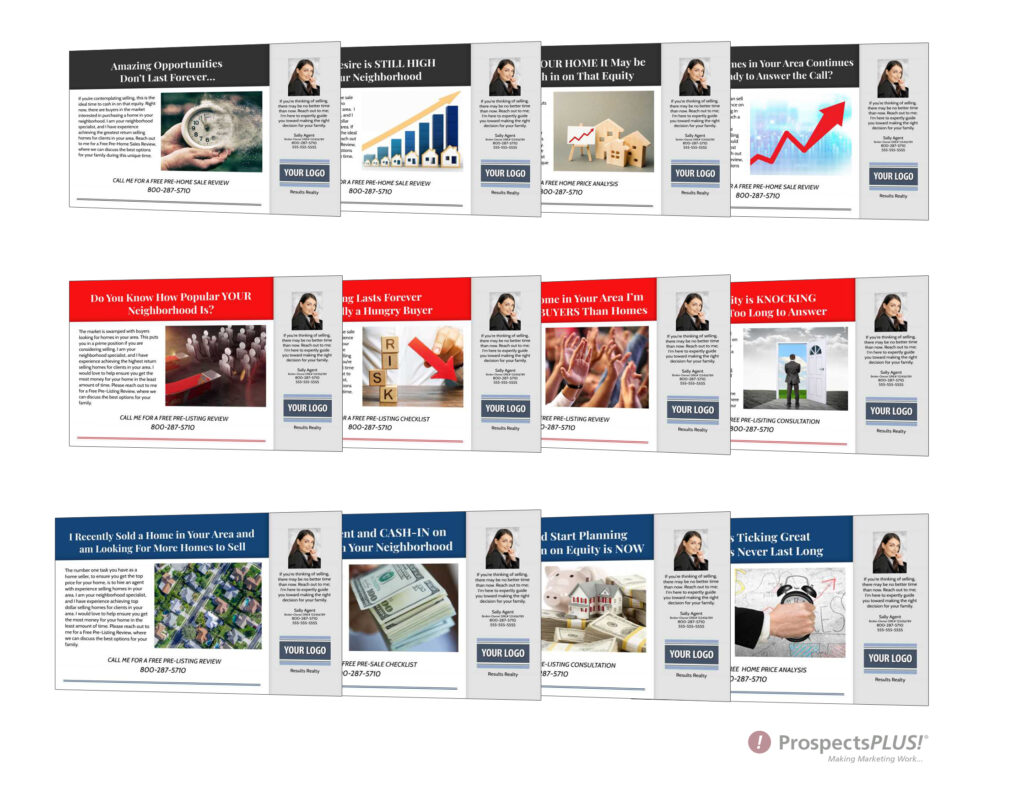
1.Compile Contacts From Your Just Listed Just Sold Lists
Move all your Just Listed Just Sold mailing lists to the Contact Manager. As you move them, “tag” the lists with the name of the neighborhood they are from.
Now you can send follow-up postcards or schedule a campaign to go out to specific contacts from various “tagged” neighborhoods. The Just Sold Follow-Up campaign or a postcard from this series is a great choice.
2. Create Monthly Customer Birthday Lists
Upload your SOI list or move your current one into the Contact Manager. Add birthdays to each contact’s personal information in the space provided.
Now mid-way through each month, you can select and send a birthday card to all of your contacts with a “Tagged” birthday for the upcoming month. You can even schedule these Birthday postcards to go out for the whole year in one sitting.

3. Create Monthly Home Anniversary Lists
Upload your SOI list or move a current one into the Contact Manager. Add the home anniversary date to the applicable contact’s personal information in the space provided.
Now mid-way through each month, you can select and send home anniversary postcards to go out to all of your “Tagged” contacts with a home anniversary in the upcoming month. You can even schedule these cards to go out each month for the whole year in one sitting.
4. Tag Your Past Clients for Special Mailings
When your current client becomes your past client, be sure to “tag” them with a “past client” tag. Now they are ready for you to be able to quickly pull together a targeted list to send out special Customer Appreciation postcards, thank you’s, and referral reminders.
5. Tag Your Buyers Across Lists For Special Mailings
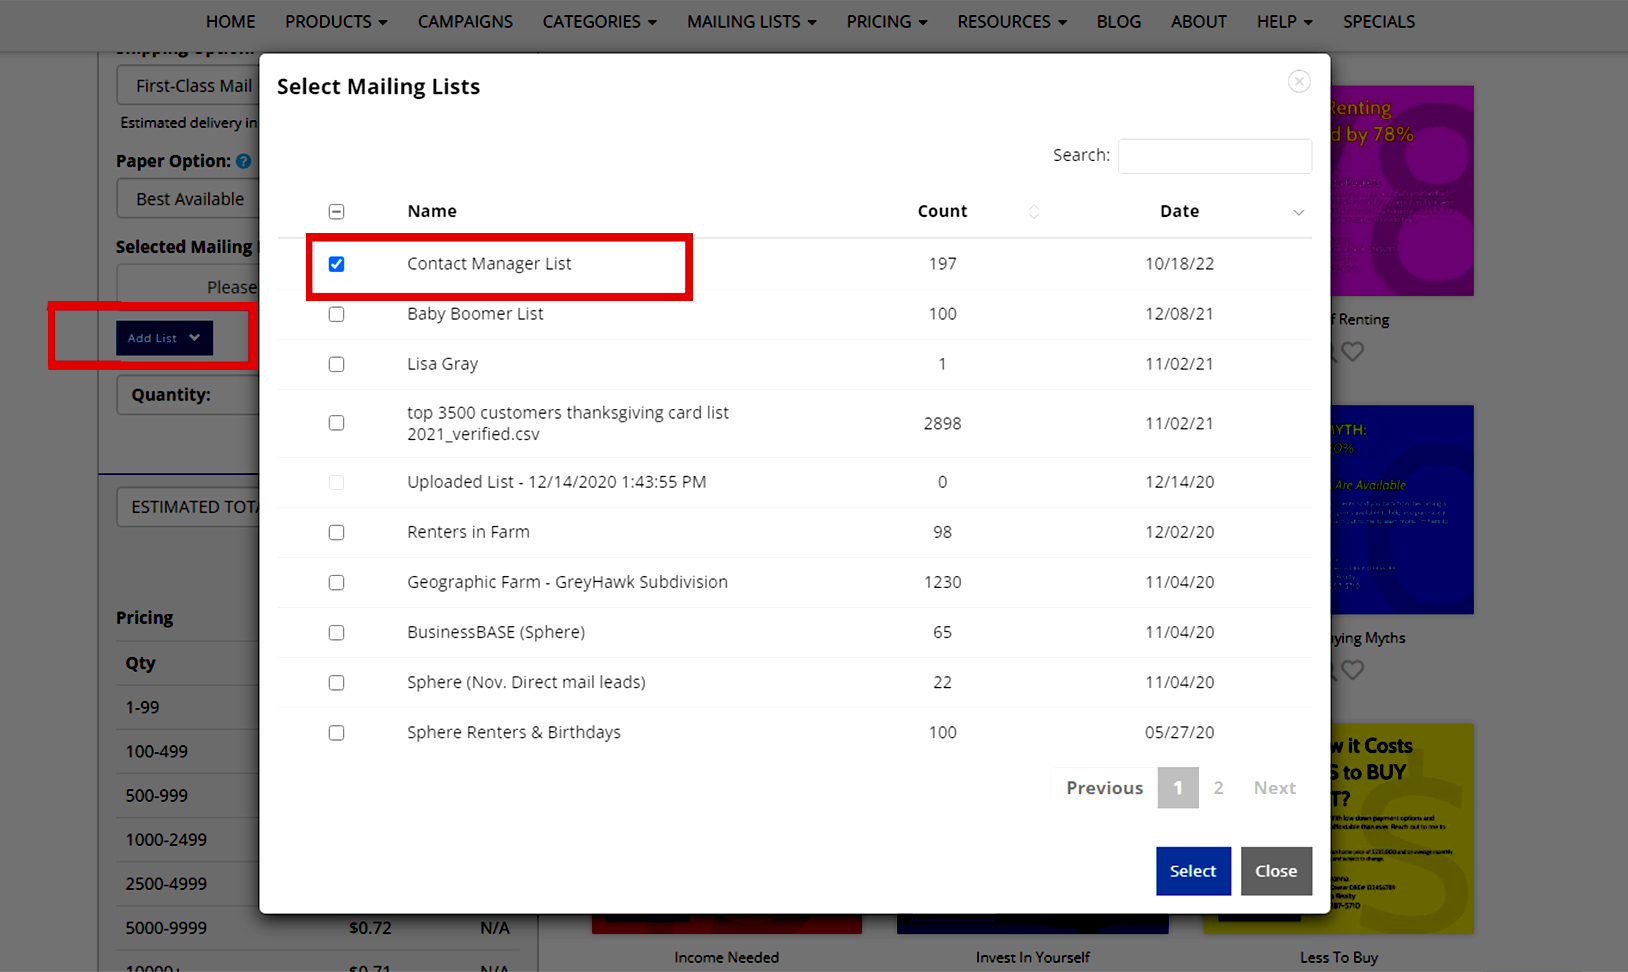
Any time you create a list of buyers, be sure to tag them with the “buyers” tag. Now you can send a targeted mailing to all of your buyers across several lists.
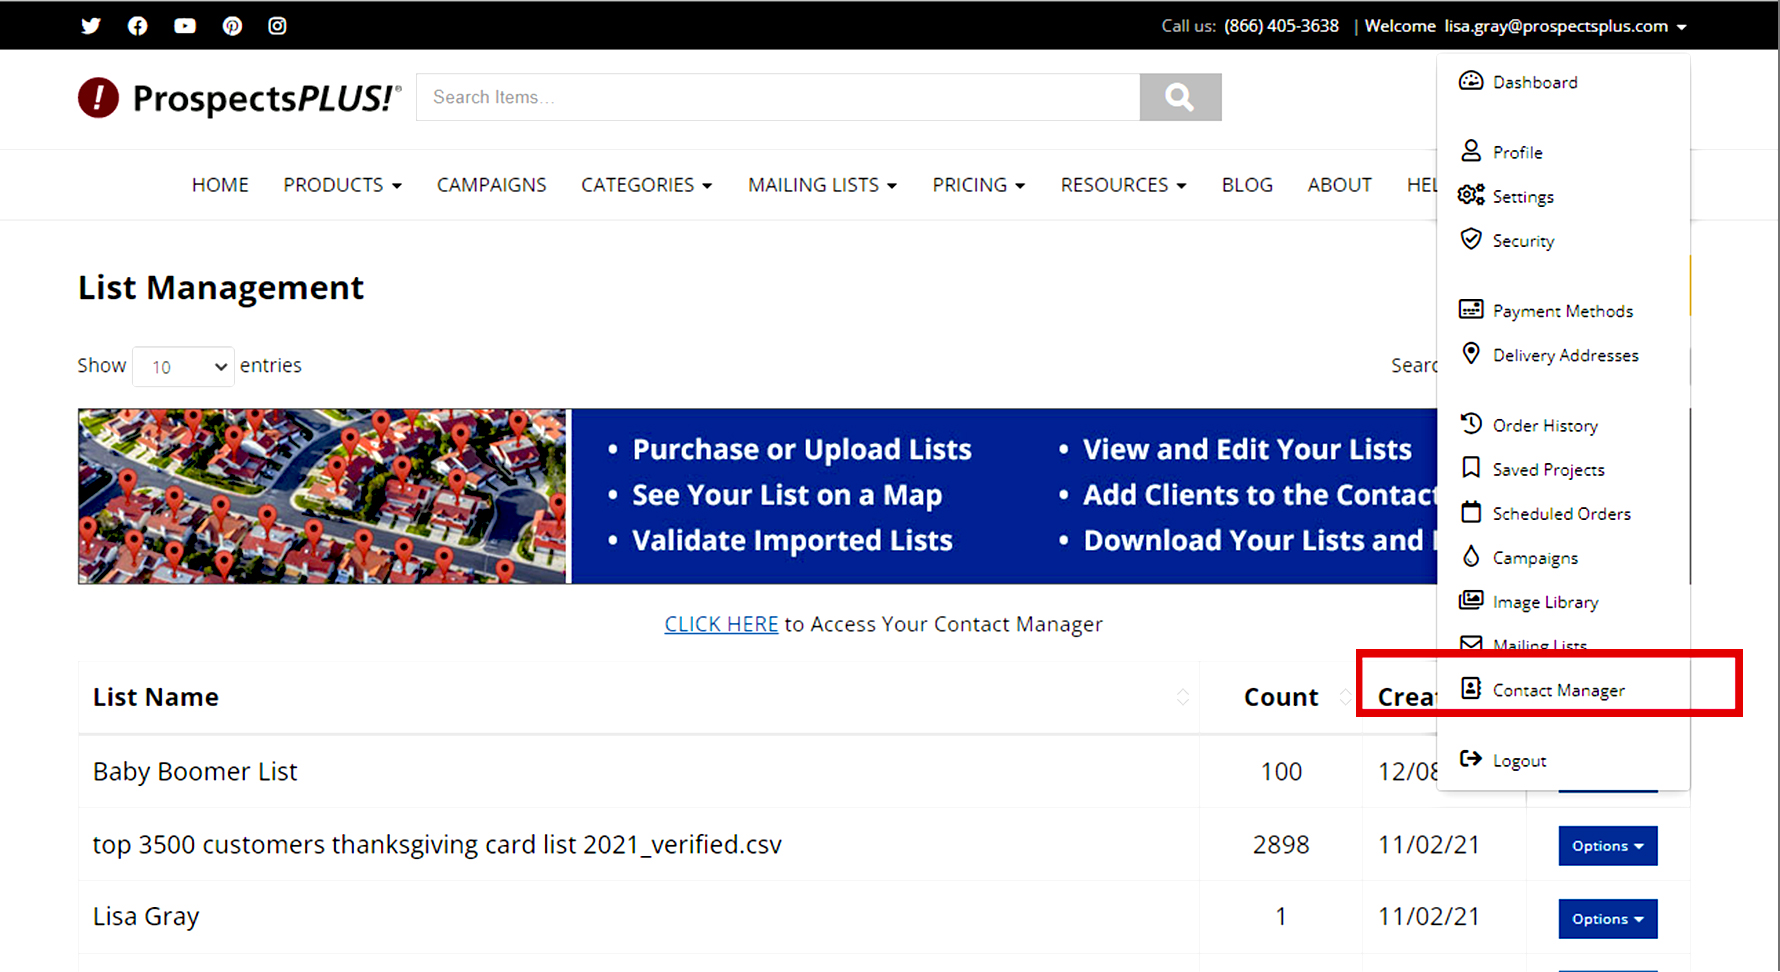
To get started with the Contact Manager tool now, CLICK HERE.
Or check out our basic Contact Manager Tutorial, CLICK HERE.
A couple More Notes About the New Contact Manager:
- This is not a free trial. Our Contact Manager will be free to our ProspectsPLUS! members indefinitely.
- If you have a CRM you currently use, by all means, continue. However, if you are purchasing a mailing list from us at any time in the future, it’s worth your time to take a moment and tag that list in the event you may want to take advantage of that tag in the future.
- We don’t share or sell your data. Please visit our privacy policy in the footer of the website and if you aren’t comfortable initially take a look at our reviews and maybe just start with lists that you are purchasing from us as we already have that data and are providing it to you.
- We certainly hope you choose to stay with us, but you can always download any or all of your lists out of the website at any time you choose to, and we even allow you to download a string of data that shows you the tags you associated with your contacts so that it will make it easier for you to take it to your next list management CRM platform.
Please reach out to our support team at 866.405.3638 with questions or if there is anything we can do to help you in your success.

Homes & Life Magazine is the ultimate “Coffee Table Lingerer”! …and it costs less than sending a greeting card! – Click Here
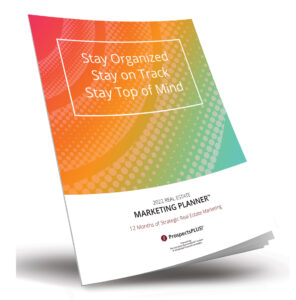
2. The Free 12-Month Done-For-You Strategic Marketing Plan
The Real Estate Marketing Planner is a powerful 12-Month-Guide that strategically defines what marketing to do and when. Four key market segments include niche Markets, geographic farming, sphere of influence, and past clients. – Click Here
3. The BusinessBase, SOI building system

The most effective thing you can do to build a real estate business is to become more visible, more likable, and remembered more often. The BusinessBASE™ not only checks all of these boxes but is also a business-building machine. In two easy steps, you can begin to build a robust sphere of influence that will provide you a lifetime of repeat business and referrals. – Click Here
4. The Free Interactive Real Estate Business Plan
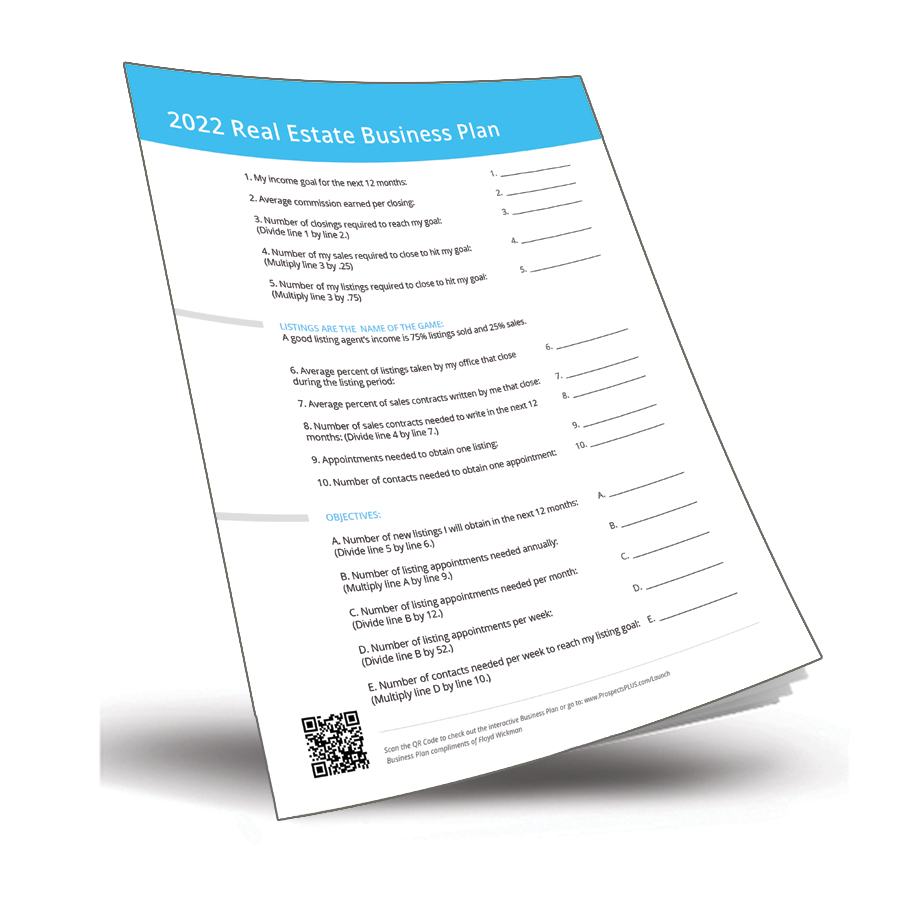
The Free Interactive Real Estate Business Plan allows you to enter your business goals for this year and get a breakdown of how many prospects, listings, closing, and so on are needed to reach your goals. – Click Here
5. The Become a Listing Legend Free eBook
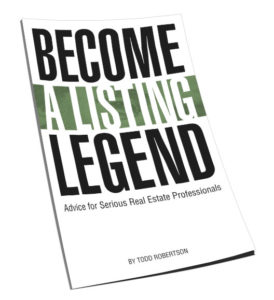
Ready to take a vertical leap in your real estate career? If you’re looking for inspiration…and the tools and methods to dominate a market and go to the top in real estate…you’ll find them in this free book. – Click Here
6. The Take a Listing Today Podcast
Watch the ProspectsPLUS!, Take a Listing Today Podcast for actionable content to help you get more listings. – Click Here